This week’s tip focuses on wildlife and how to make the best possible images of the animals you encounter. Whether you travel to India to photograph tigers, Alaska for bears, China for pandas or the Pacific to capture whales, many guidelines and strategies remain constant. As a matter of fact, because of the immense size of many wildlife subjects, the hoops through which photographers must jump to make good images are exacerbated.
As with any wildlife subject, it’s to your advantage if action, behavior, movement or a combination of these can be depicted. I don’t deny that to capture a clean and basic portrait is a worthy shot, but if that subject displays a comical expression, performs an action, stalks its prey, lets out a yawn or runs, the resulting photo can show more drama. A story can be formed in the viewer’s mind as opposed to him or her just bearing witness to the species. The challenge is in the investment in time to wait for the animal to put on a show. The challenge is also to have the animal display behavior in a clean environment. There is never a guarantee the subject will do something dramatic, but the bigger guarantee is that if you don’t invest the time and effort, you don’t get the shot.
.jwplayer { margin-bottom: 20px; margin-left: auto; margin-right: auto; }
Avoid Clutter
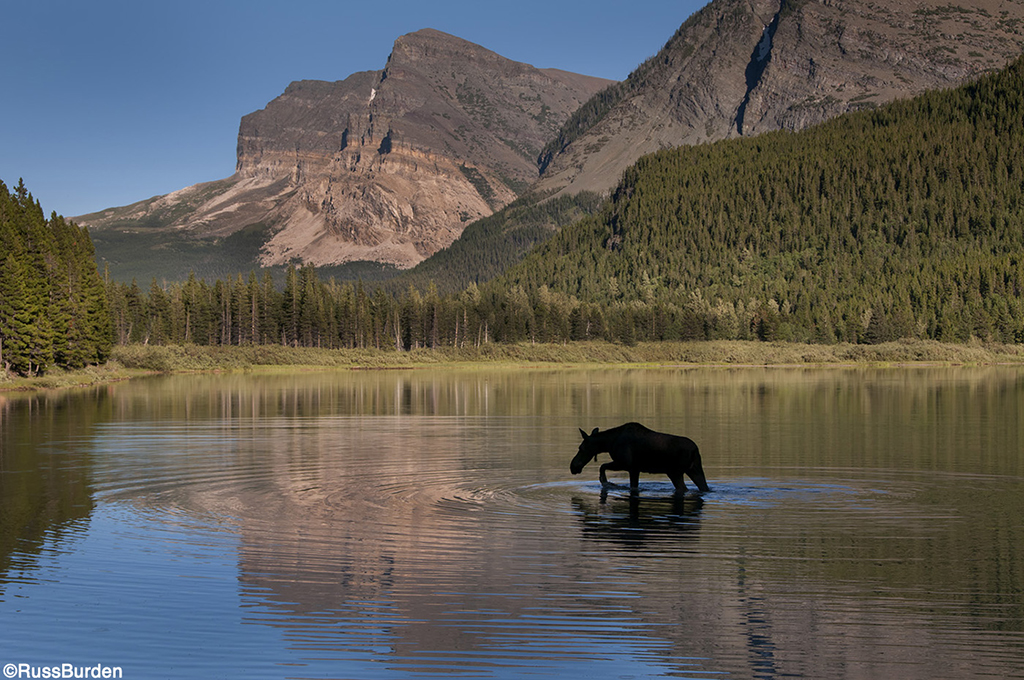
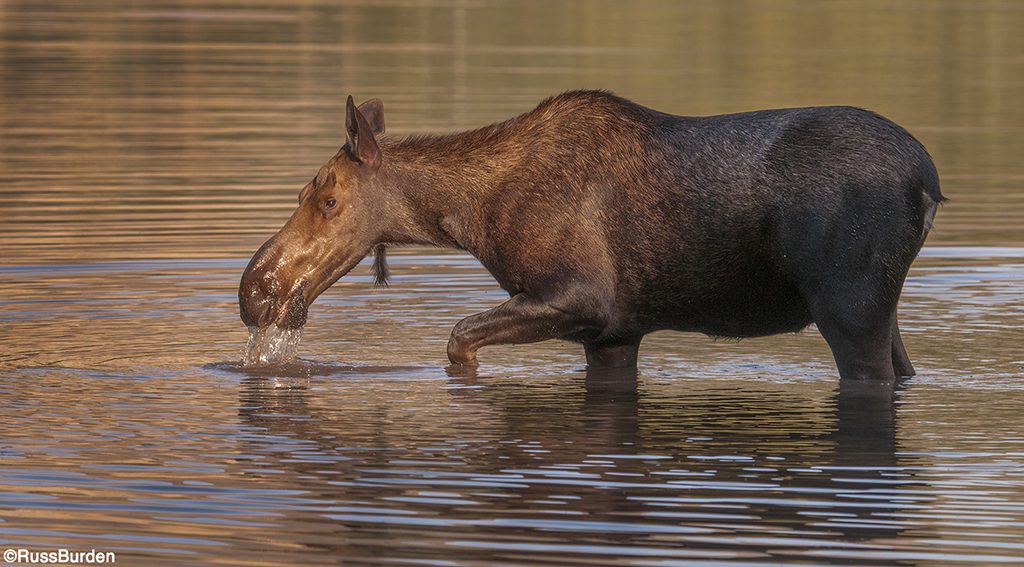
Subjects that occupy areas of the environment that lack clutter and busyness net cleaner images. For instance, if the viewer of the photo has to decipher where the leg of the moose ends from where a branch or twig begins, it creates confusion. Photograph that same moose in an open field of short grass and it becomes clear and evident where every body part resides. The challenge is that the photographer can’t dictate where he or she encounters the moose. This is where time in the field becomes important and gaining knowledge of the subject is critical. Use a long lens with a wide-open aperture to help throw the background out of focus. Spend time with the subject. Wait till it moves to a more open location. Be patient and be persistent.
Show The Location
Synonymous with wildlife photography is the super-telephoto. But just because you own one doesn’t mean it has to be used to make every shot. If the environment in which the animal is encountered is scenic, break out the wide angle and include the mountain, lake, ice field, kopje, etc. Make both a vertical and horizontal and position the subject in the rule of thirds.
Evaluate The Light
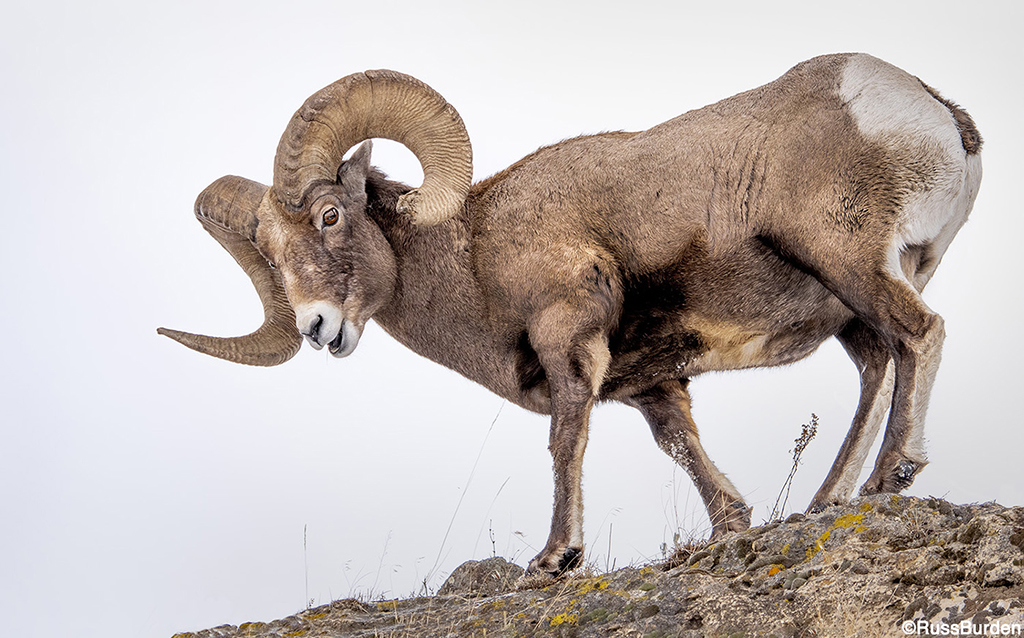
In the image of the bighorn ram, the sky was very bright. The original RAW file had more sky and I cropped approximately 30 percent of the file. With all the sky in the composition, the meter read the scene as very bright. Had I used the setting the meter suggested, the ram would have been very dark. Use exposure compensation to “correct” the exposure for the subject. The camera did read the “proper” exposure, but it didn’t know I wanted to show detail on the ram. I, therefore, overrode the camera settings and dialed in +1 1/3 stops of light. It behooves you to learn how a camera meters a scene and what YOU need to do to take charge.
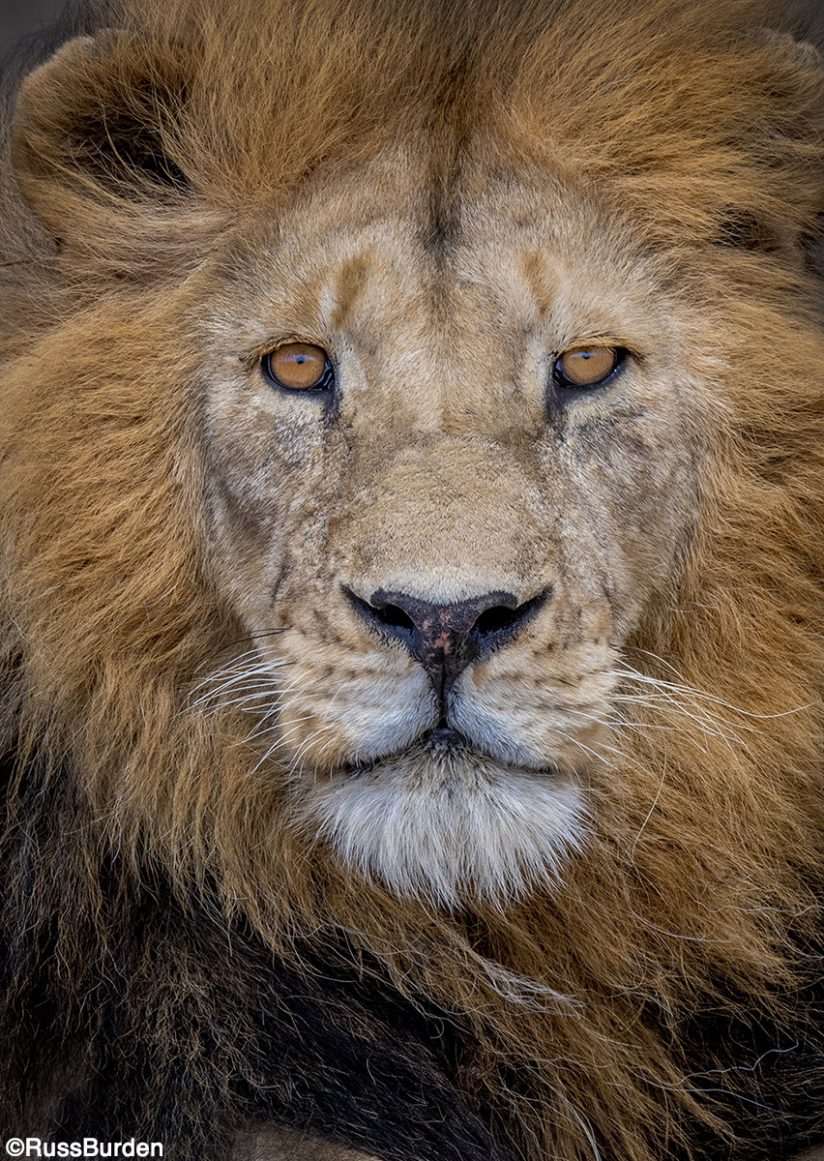
Headshot
Now that you’ve digested the above paragraph, I encourage you to use the long lens, especially when the animal allows you to get close to acquire the elusive headshot. A frame-filling portrait of a wild animal makes a powerful image. Although it doesn’t evoke a “sense of place,” the impact can be intense. Be patient and wait for the eyes to relay a message, be wide open, show expression, show emotion or make direct eye contact.
Spotlight
Good light makes or breaks a photo. One aspect of light that rarely happens is what I refer to as “the edge of light.” I’ve written previous tips on the subject. When an animal emerges from a shadow and it’s partly lit and partly in the sun, the brighter part will stand out. That area becomes the primary focus. If you see an animal in the shade or if a passing cloud casts a shadow, stay ready and as soon as the animal or cloud moves and the face gets lit, make the image.
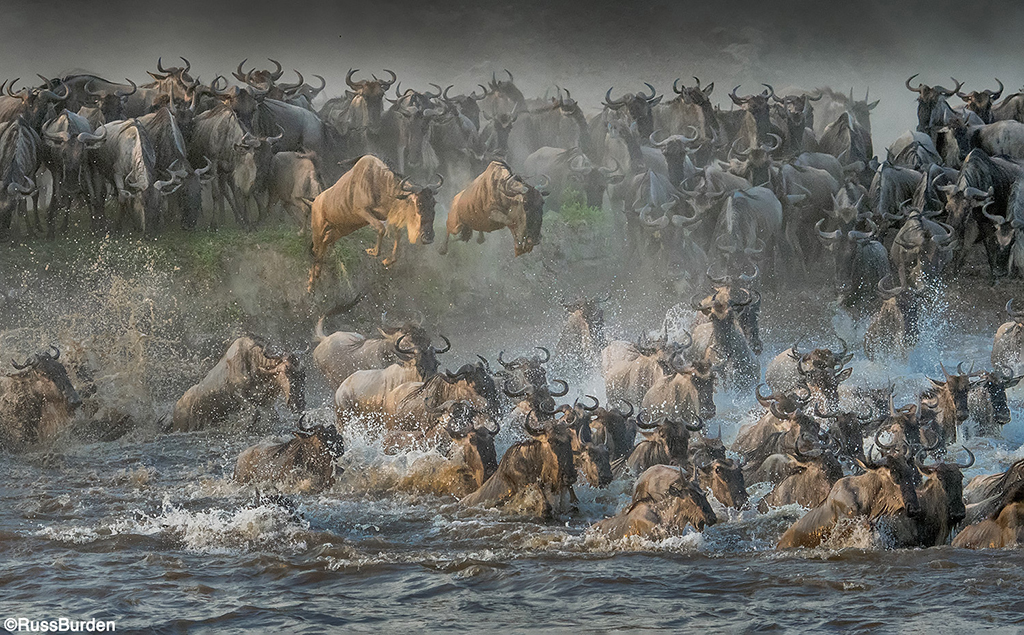
Seasonal
One of the safaris I lead to Tanzania focuses on the wildebeest crossing the Mara River. They do it twice a year during the migration. Since I base my safaris in Tanzania, I wait for August and September as the herds return from Kenya. This way, we get to photograph their faces as they cross as opposed to the rear ends. Be sure to do your homework and know when your subjects mate, birth, migrate, display, are more aggressive, etc. When the action heats up, vary your focal lengths to isolate single animals, photograph small bunches, and also make the wide-angle image.
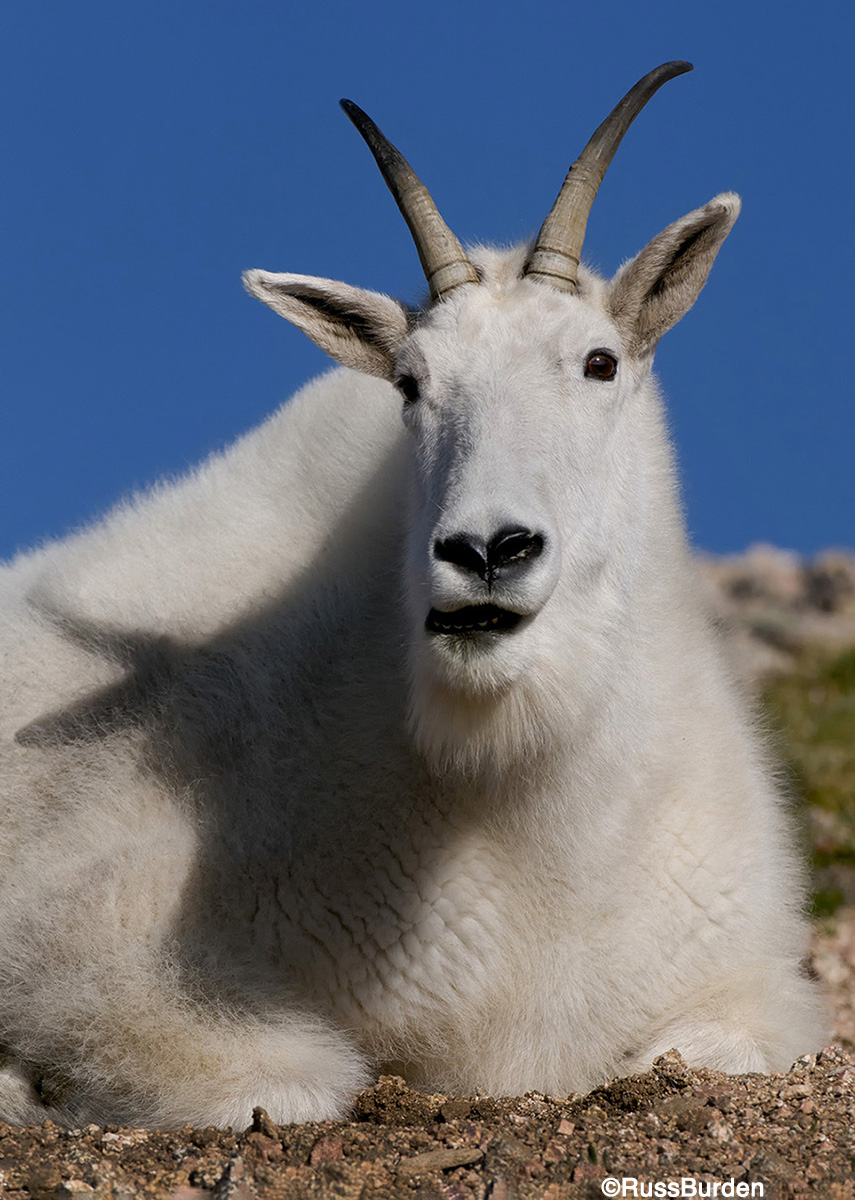
Strategic Light
Keep your eye glued to the viewfinder to avoid overlooking a potentially great image that may not be obvious. In the headshot of the mountain goat, I was dialed into the fact I wanted a clear blue sky as the backdrop and wanted to be on eye level with the subject. When the sun broke free from a cloud, a perfect shadow of his face and horns was cast on the side of his body. Eye-to-eye level is good, blue sky background is good and always be ready for that special moment when something unexpected occurs.
To learn more about this subject, join me on a photo safari to Tanzania. Visit www.russburdenphotography.com to get more information.