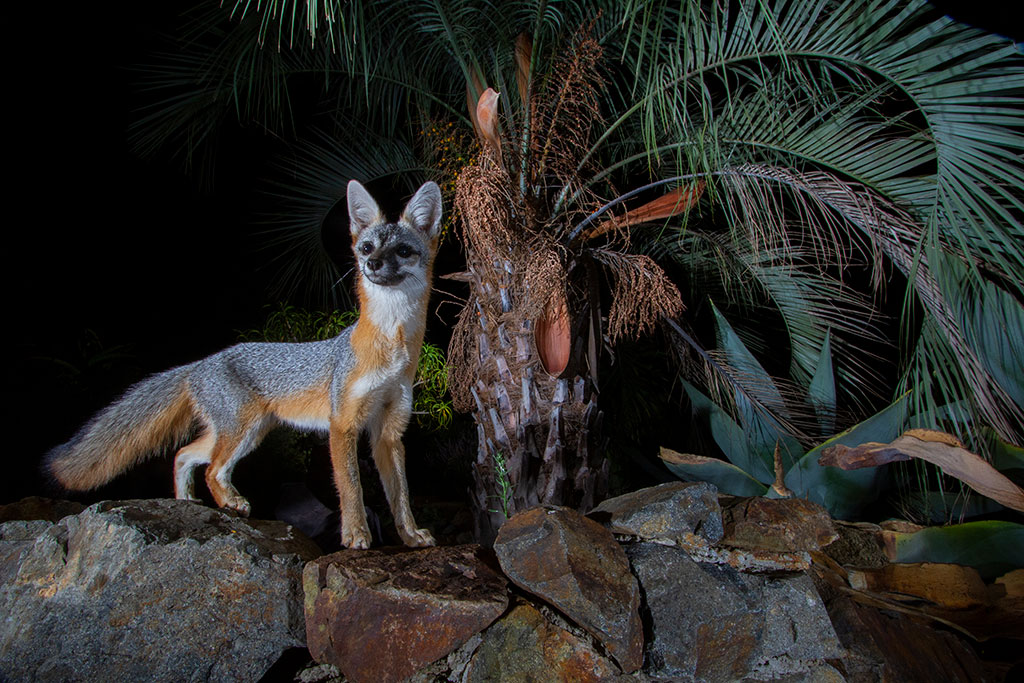
California gray fox at a fruiting palm tree. “These Butia palms produce sweet fruits every year which the foxes really enjoy eating,” Toft observed, “so I placed a camera trap to catch them coming during the night.” Canon EOS 7D, Sigma 10-20mm F3.5 EX DC HSM at 10mm, four Nikon SB-28 Speedlights, Camtraptions PIR Motion Sensor. Exposure: 1/100 sec., ƒ/16, ISO 500.
As a dedicated conservation photographer, Roy Toft often turns his lens toward exotic subjects like jaguars in the Pantanal, pumas in Patagonia and harpy eagles of Brazil. Like many wildlife photographers, he tends to shoot with a long lens. He crafts his compositions, checks his light and waits for moments to happen. But it was an opportunity in his backyard that allowed Toft to tap back into a specialist skill that had grown dusty—camera trapping, a technique often reserved for big-budget projects or seen on the pages of publications like National Geographic.
The project, which he dubbed “Wild Ramona,” has allowed him to see a well-practiced profession and his home with fresh eyes and has revealed a story of nature’s resilience in the wake of devastating loss.
Toft lost his home when a wildfire blazed through his property in Ramona, California, a suburb of San Diego, in 2007. He spent years painstakingly rebuilding and rehabilitating his land, a 28-acre parcel that abuts a valley of chaparral, desertous mountain landscape characterized by scrubby shrubs and grasses.
He has always taken joy in photographing the wildlife that visits his home and began casually camera-trapping as a way to see what else was around. A busy travel schedule leading tours and workshops made his efforts scattered and infrequent, but like many photographers, during the pandemic, he no longer always had one foot out the door.
.jwplayer { margin-bottom: 20px; margin-left: auto; margin-right: auto; }
Toft took it upon himself to really see what the wildlife was up to on this shared piece of nature. So far, he’s placed six camera traps on the hillslopes around his house. What he found astounded him. More than 10 different mountain lions roam through his property. Foxes and coyotes trot by at night and during the day, sometimes carrying prey. Bobcats drink from watering holes, and raptors take baths. We talked with Toft about what he’s learned and gained a few pointers for those wishing to dive into this form of photography.
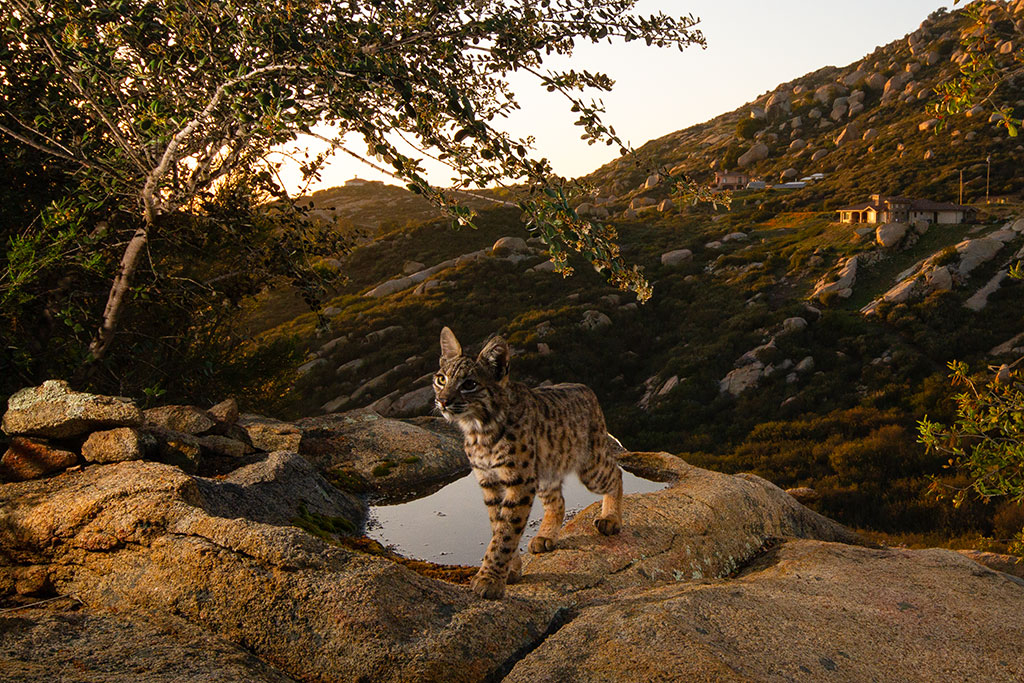
A young bobcat drinks at a water hole created by a small natural depression in the granite boulder that fills with rainwater after a downpour. Toft adds water weekly to keep it full. Canon EOS 7D, Sigma 10-20mm F3.5 EX DC HSM at 16mm, three Nikon SB-28 Speedlights, Camtraptions PIR Motion Sensor. Exposure: 1/250 sec., ƒ/11, ISO 400.
Outdoor Photographer: How did the Wild Ramona project begin?
Roy Toft: We have a chunk of property behind our house, and it’s pretty wild. Even though there’s houses around the rim of it, there’s cool stuff down there. I’d see occasional things, but I know there’s many things I don’t see. So, I started putting little trail cams, hundred-dollar trail cams, down there. You get your odd raccoon and opossum and bobcat and get excited, but it was just these little crummy clips. I was doing it for video just to see what’s there.
Maybe six years ago, I put out an old camera trap. I used to camera trap a bit with Nick [Nichols] doing the tiger project in the mid-’90s. So, I had that background of working with one of the best. I put a camera trap out, and I did get a puma, and it was a cool picture. It was the first time I knew we had a mountain lion walking through this valley. So, I thought, let’s get four or five, six traps out there, and let’s really start trying to make nice images of this cool stuff that I know is here.
OP: What was it like when you started getting images back?
RT: It’s like Christmas every time you get your cards, and you’re always seeing new stuff, new behaviors or animals. Animals you wouldn’t think would do this, and they’re there. I had a western spotted skunk, didn’t even know they existed here. One night at midnight, I had a raccoon walking up the trail. Boring but cool. And then, two hours later at 2 in the morning, a mountain lion came walking down the trail with a raccoon in his mouth. So that raccoon didn’t quite make it up the trail very far.
There’s always that stuff you see in the images, stuff you know is there but don’t see. I mean, I never see bobcats. They’re in my traps all the time. So it’s a validation that this stuff is there, and it’s there in good enough numbers, and activity is happening all of the time. And visually, as an artist, to be able to light it the way you want and be close and wide, that’s just sexy and fun.
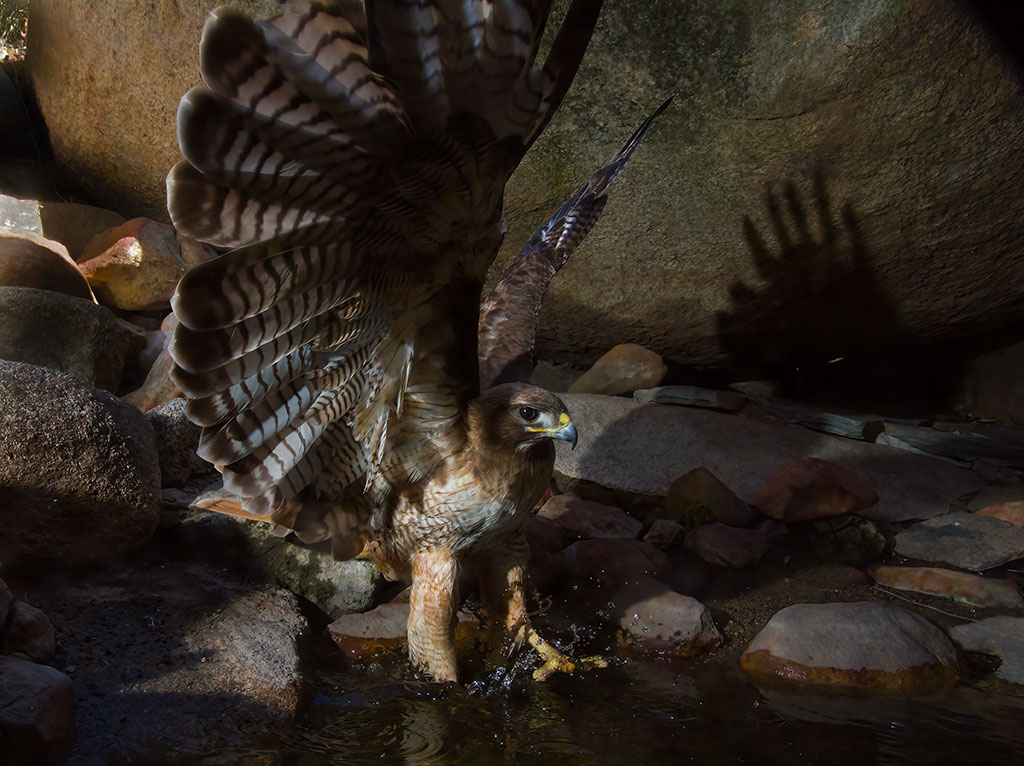
Red-tailed hawk lands at a water hole. Canon EOS 7D, Canon EF-S 10-22mm f/3.5-4.5 USM at 14mm, three Nikon SB-28 Speedlights, Camtraptions PIR Motion Sensor. Exposure: 1/250 sec., ƒ/13, ISO 640.
OP: What kind of impact has this had on you and your community?
RT: I’ve always been on the educational side of activism for wildlife, especially running the trips that I do. Let’s normalize wildlife and normalize encounters with wildlife and be stoked about those encounters and not turn it around to be a negative, sensationalized, “we’re in danger” sort of thing. When I started getting some mountain lions, I’d always let my neighbors know and be like, “How cool is that?” instead of, “Grab your children and arm yourself.”
There are people here who have lived in Ramona 30 years, going on walks, and all that time, mountain lions are walking around, and they were fine. It’s just our knowledge and the technology that has changed. We’re never going to encounter a mountain lion, but they’re there.
I have seen a change in my neighborhood. I have local Facebook groups for my community. They’re in their backyard taking pictures and wanting to know what something is. Now, the neighbors call me. They used to kill rattlesnakes left and right. Now, they call me, and I race over there and catch it and can release it. And hey, if that’s all the change that I can do, you know, just in my neighborhood, it’s worth it. Because, you know, a lot of people doing what I’m doing, that goes a long way.
OP: In your course of pursuing this, what kinds of challenges did you have to face?
RT: There’s all the technical aspects of things going wrong and things that just happen with camera traps. You have a trap that’s working, and then it’s like there’s a gremlin. You move something, and now it’s not working, or it’s false triggering. The sun is at different angles, and it does weird things. So often, it’s intangible. You can’t figure it out. I’ve had sets where they just never work. It just hates this area. It’s like their Bermuda Triangle.
For typical camera trap projects, it might be a three-hour hike to get to your trap, and then you realized that it hasn’t worked for the last three weeks. The beauty of doing camera trapping in your own backyard is it’s not a huge hardship. If something fails, I can get to it and get back to the house and get back to it the same day. I’m just blessed because it’s my backyard. No one else walks on those trails, never had anything vandalized, never had anything stolen. We don’t have bears. So nobody tears up my camera. [Sidenote: Bears, with their bulk and inquisitive nature, are notorious camera-trap destroyers.]
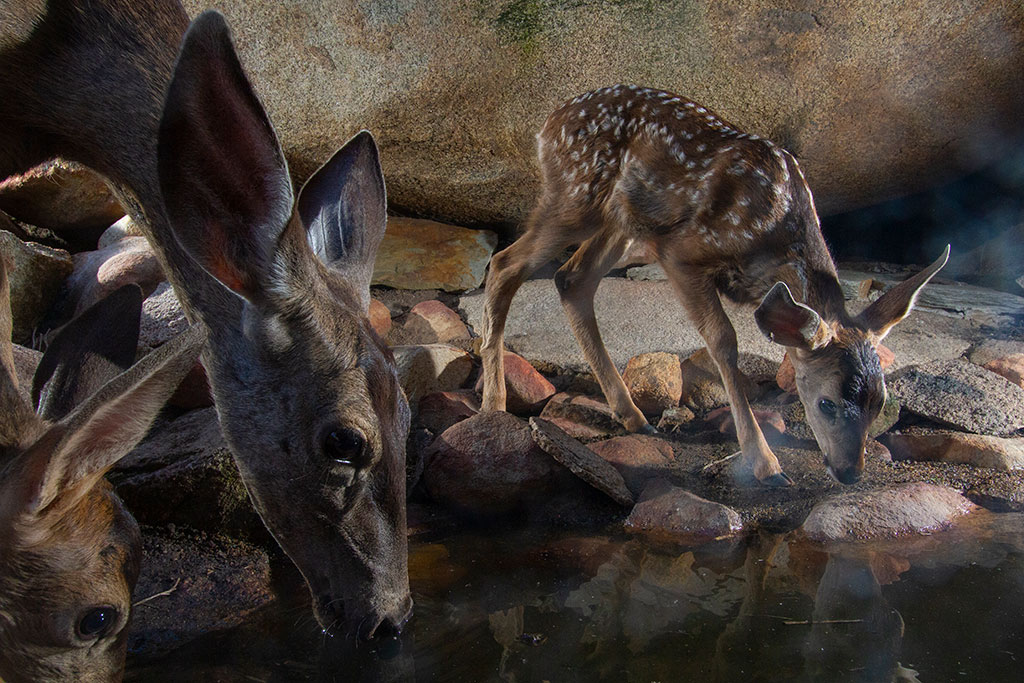
A mother mule deer and her two fawns drink at a water hole. Canon EOS 7D, Canon EF-S 10-22mm f/3.5-4.5 USM at 15mm, three Nikon SB-28 Speedlights, Camtraptions PIR Motion Sensor. Exposure: 1/200 sec., ƒ/11, ISO 800.
OP: How have your techniques evolved now that you’ve been working on this for so many years? I imagine that while you may initially have all of these creative bursts, once you get into it, you get to a point where if you’re going to keep doing this, you have to push yourself more, especially when it can be really tempting to just relax at home.
RT: I get lazy just like everybody. I should have the flexibility to really push the envelope, like really do some crazy stuff. Stuff that’s low probability but big payoff, but it’s hard when you have sets that are just solid, and you’re getting cool stuff, but it’s kind of the same stuff. You have to previsualize a little bit more. Think about what you want.
I’m doing this really wide and close shot at this one pond. It’s basically a 10mm, so a 16mm equivalent, and the subject-to-camera distance is like nine inches. So it’s things like little lizards coming for water and birds that, of course, look cool at wide angle at 8 inches.
I’m trying to do a pure nighttime shot at high ISO, trying to get stars. I’m missing so much stuff because it’s basically turned off all day. It’s like, yeah, five months, and I’m like, I’m missing daytime bobcats drinking water. I’m missing all this good stuff. So you need…
OP: You need to double your number of camera traps is what you’re saying.
RT: Exactly. You really do. Because you want to still have some productivity, but you want to get the over-the-top stuff, too.
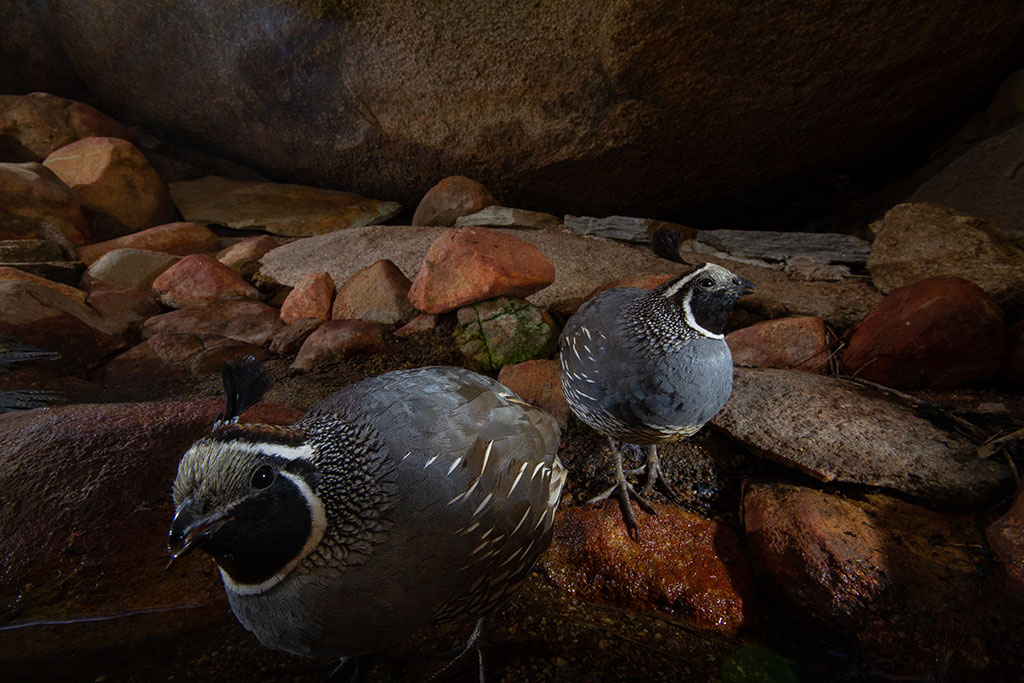
Two male California quail at a water hole. Toft built this water hole at a natural water drainage below his house. Canon EOS 7D, Sigma 10-20mm F3.5 EX DC HSM at 10mm, three Nikon SB-28 Speedlights, Camtraptions PIR Motion Sensor. Exposure: 1/250 sec., ƒ/16, ISO 640.
OP: Do you have any final thoughts that you’d like to share about the experience or the process?
RT: We love where we live most, or at least we try to make it a place that we love to live. Doing a little work, brushing an area off to the side of your house, or even a part of your backyard, if you have a little bit of a water feature, a little fountain, there is stuff that’s coming in there. Just putting a trail cam is one thing, and it’s really cool. Even doorbell cameras, they get cool stuff walking across the driveway. But when you can look at a high-end DSLR image, it’s just transformative. It’s a rewarding thing that I think a lot more people could do and get great satisfaction from, a lot of positive outcomes. It’s not this unattainable crazy, photographic technique. It’s very doable.
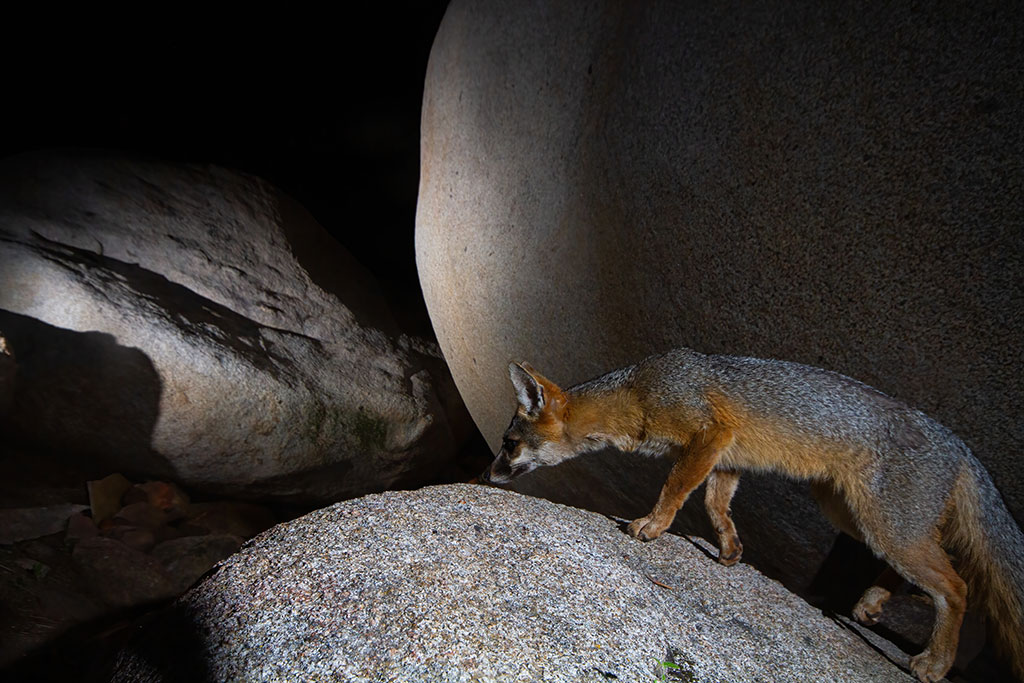
California gray fox climbing on boulders. Toft captured repeated video of a pair of foxes climbing this boulder, so he decided to place a camera trap at the spot. Canon EOS 7D, Sigma 10-20mm F3.5 EX DC HSM at 16mm, four Nikon SB-28 Speedlights, Camtraptions PIR Motion Sensor. Exposure: 1/250 sec., ƒ/11, ISO 400.
Toft’s Tips For Camera Trapping
Gearing up? Tap into your inner MacGyver. There are a number of companies making set-up super easy. Cognisys and Camtraptions are two of the leading companies that offer trigger setups at affordable prices. With Cognisys, they offer housings and flash systems, in addition to triggers, whereas Camtraptions offers housing and flash triggers, but you will need to assemble a collection of flashes (used Nikon SB-28s are popular) and modify the triggers for longer battery life.
Don’t think you have to drop hundreds on specialty housings, says Toft. Depending on the level of protection you’re after or your budget, Toft has used everything from plastic bags and modified pelican casings for housings to cotton candy containers for flashes. “You can tinker and do stuff,” says Toft. And if not you, “Everybody has a friend that’s a good tinkerer. That’s another way to build community. I get to send pictures to my neighbor and say, ‘Hey, look what we got.’”
Scout your locations and your subject. Pay attention to signs of use, such as animal tracks, scat and scent marking, and to natural features like watering holes that indicate wildlife are in the area. You’ll want to compose your images based on the size of animal that you’re after, so decide whether you want to go for low-to-the-ground or higher-up shots that will best showcase the target species. Then use cheap trail cams to get initial eyes on activity. “A key piece of information is repeatable patterns,” says Toft. “Now, if I’m here when it’s better light, and it happens again, even better. And if I stand over there and look at that background and this happens again, next level.”
Pay attention to your background. “This isn’t reactive photography,” says Toft. “This isn’t like so much of what we all do when we’re on safari, where we see something cool, and we photograph it.” You’re essentially setting the stage and waiting for the actor to appear. Try to imagine how the subject would look in your frame and then compose for the best possible surroundings. Just like you would in the moment, it’s important to think about how trees, boulders or other features could frame your subject. Would a branch cut awkwardly through the head given the scale of your subject?
“Have your camera and change perspective. Should I go wide here? Should I back up, do I want that background to compress? And for gosh sake, go out there and take pictures without a subject. It better be a pretty picture without anything in there,” he says.

A large male mountain lion that walks down the valley trail near Toft’s home every three to four weeks. “I’ve been getting images of him for the last three years, generally at night, but this image was from 6:30 a.m.,” Toft says. Canon EOS 7D, Sigma 10-20mm F3.5 EX DC HSM at 13mm, four Nikon SB-28 Speedlights, Camtraptions PIR Motion Sensor. Exposure: 1/200 sec., ƒ/13, ISO 800.
Lighting is a learning experience. “This thing’s gonna be out there for weeks. This is not the time to just throw up a set,” says Toft. All of Toft’s images are lit by at least three strobes. Two typically light the subject, and another illuminates some element of the background. Sometimes he has as many as five strobes lighting a scene. The strobes lighting your subject should be at roughly 45-degree angles and slightly above your target subject to avoid eye-shine. “It might look cool in the daytime, but think, can I make it look cool at night? You know, it’s like, I don’t have the mighty orb of the sun. I have little strobes. Can I light it up enough to make it look cool?” He might initially set up lights during the day, but it’s important to go back and adjust things to fit the nighttime scene.
Use quality camera support. “Don’t skimp on support,” says Toft. “If you walk away and your flash falls over because it was on a $3 plastic tripod that was made for an iPhone, that was a bad choice.” Anchor your gear into the ground or branches using things like tree screws, zip-ties or stakes with screws welded to the top—a perfect task for the tinkerer in your family. “It gets windy, animals come up and smell things. They pee on things. They bump against things. Everything has to be solid.”
Dial in your settings. Use manual camera settings—and don’t do rapid bursts of images. “I do an interval in between,” says Toft. He personally recommends 10 seconds. “Let that animal go back to drinking. He’s there for a reason, right? If you start blasting away and he leaves, he might not come back to that waterhole. You have to think about what’s going to have the least impact on that animal.” OP
See more of Morgan Heim’s work at morganheim.com. Learn about photo expeditions with Roy Toft at toftphoto.com.
<!–  Text By Morgan Heim / Photography By Roy Toft –>