I love the feel of sun on my back as it signals the beginning of a new day. The warmth, color, quality of light and illumination can’t be replicated at any other time of day. The same holds true for the light that appears just before the sun sets in the evening. Both are special and highly revered for landscape and wildlife photography. Regardless of the horizon that’s illuminated, the light is obvious and distinct. This greatly contributes to the fact landscape photographers love to exploit it. But there’s another special time that occurs just a bit before the sun rises and a bit after the sun sets that’s equally as mesmerizing, albeit a bit subtler and gentler. Because it’s more subdued, it doesn’t get noticed as often. That’s a shame because the gentle pastel colors it exudes provides amazing light. Before sunrise and after sunset have become two of my favorite times to photograph the landscape. Here’s why these times of day should become your favorites too.
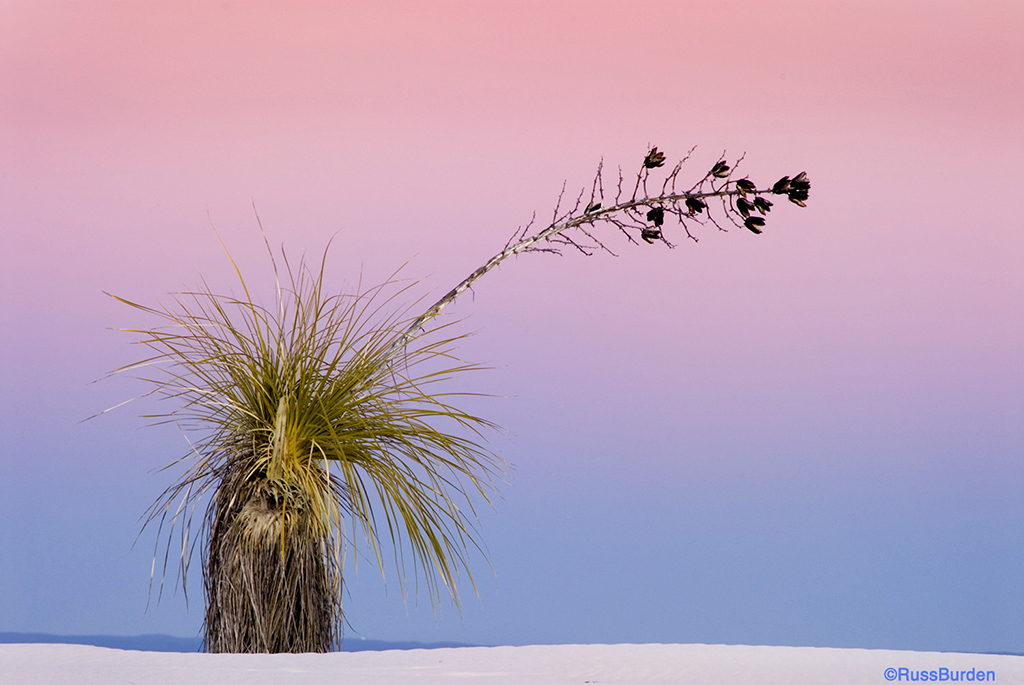
The darkness of night slowly surrenders and a short window of time graces the land with delicate and soft hued intense light. A pink to blue prism of color appears in the sky opposite the rising sun. It doesn’t occur all the time, but when it does, it pays to be on location and set up. The image of the leaning yucca in dawn light illustrates the concept. Quite often, silhouettes become the dominant subject matter, but in this case, what allowed the yucca to stand out was the reflection of the sky bouncing light off the white gypsum of White Sands National Park. Be prepared to make multi-second exposures using a stable tripod with a solid head and hope for a calm day.
.jwplayer { margin-bottom: 20px; margin-left: auto; margin-right: auto; }
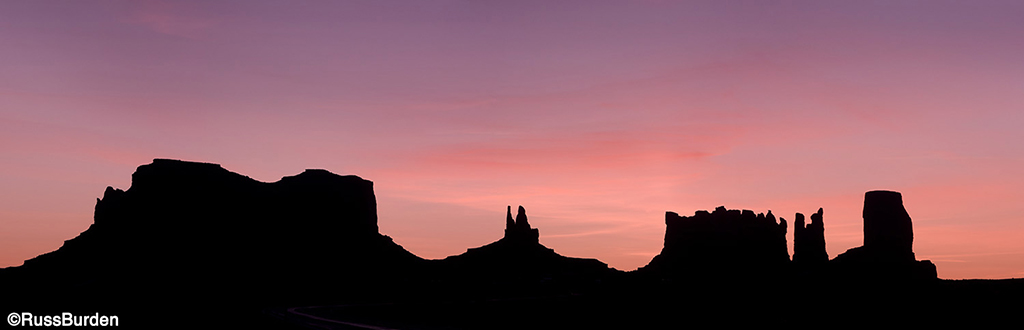
The magic light of dawn and dusk provide color based on a number of variables: clarity of the horizon where the sun rises, the cloud structure above the rising sun, clarity of the sky 180 degrees from the rising sun, the amount of moisture in the air, along with a few other factors. It’s the job of the photographer to find a good subject and compose it in a way that complements the drama.

The color changes rapidly and doesn’t last long. At times, it’s extremely intense, and at others, it’s nonexistent. At dawn, it starts out very blue and quickly warms in hue. Within a period of 45 minutes, there’s a remarkable change. As the colors warm up, experiment with the white balance. Daylight will result in what the eye sees. Auto will try to correct it to what the camera thinks is “proper.” Cloudy adds warmth. Shade adds even more toward the yellow/red spectrum.

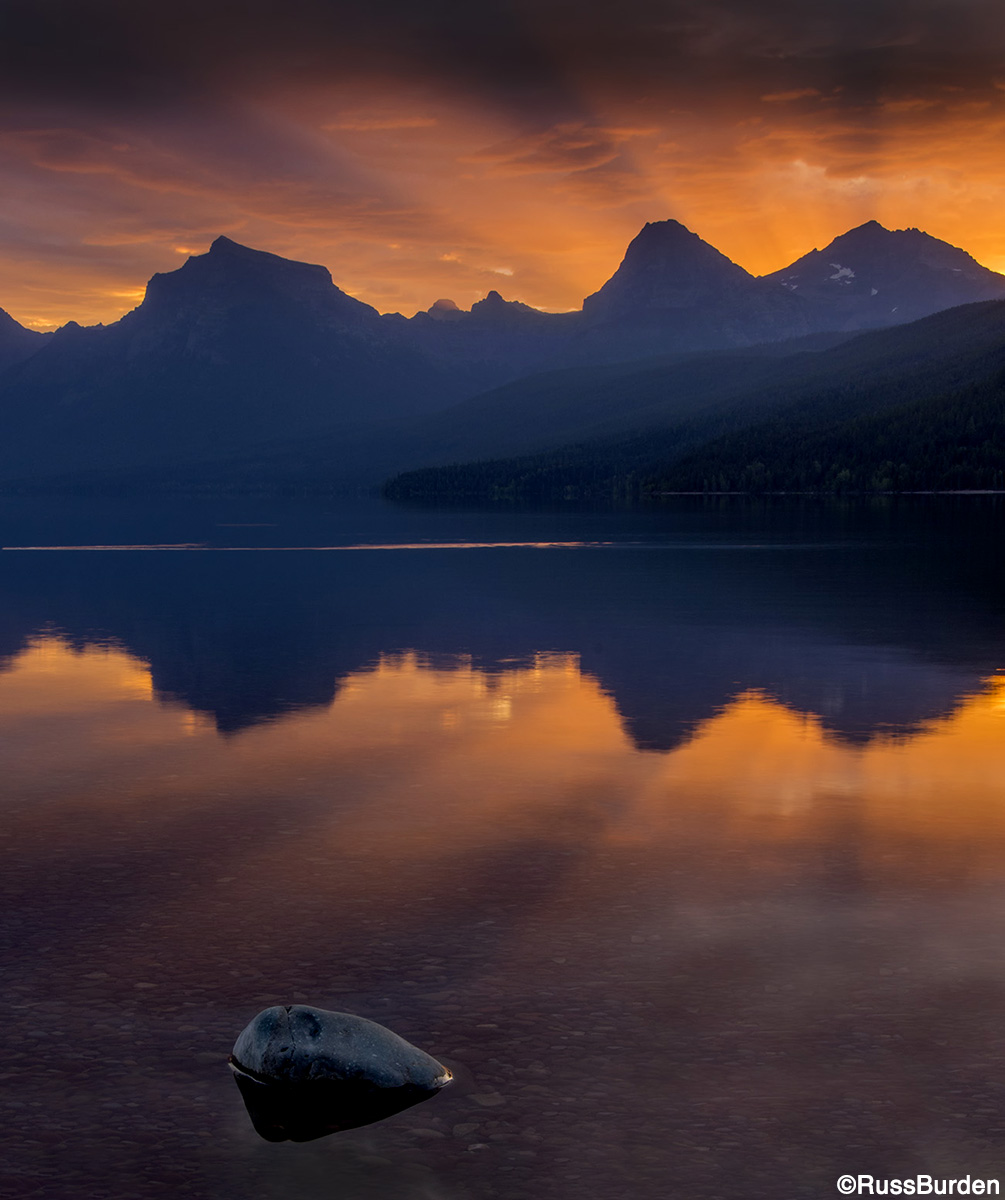
When scattered clouds exist above the horizon of the rising or setting sun, monitor the wind direction and speed. Try to determine the best place to be when the clouds reflect color and light up the sky. You want to juxtapose the most intense color with the primary subject. The best color is always before the sun breaks the horizon in the morning and after it dips below the horizon in the evening. The same holds true for the color on the opposite horizon. One of the phenomena I love to capture is God Rays as depicted in the photo of the rising sun over Lake McDonald in Glacier National Park.
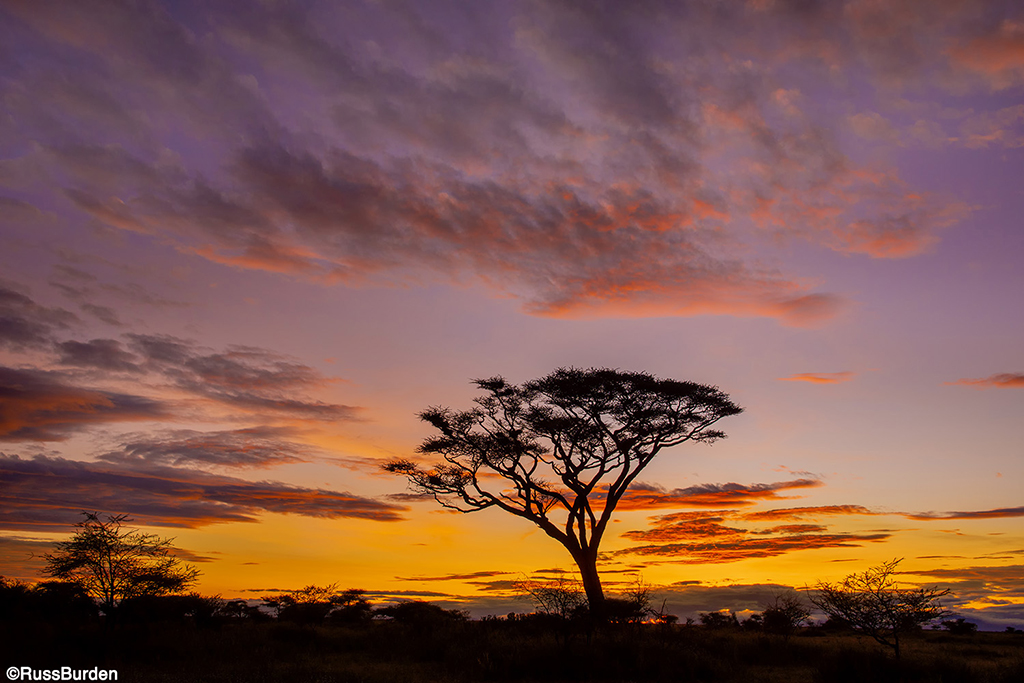
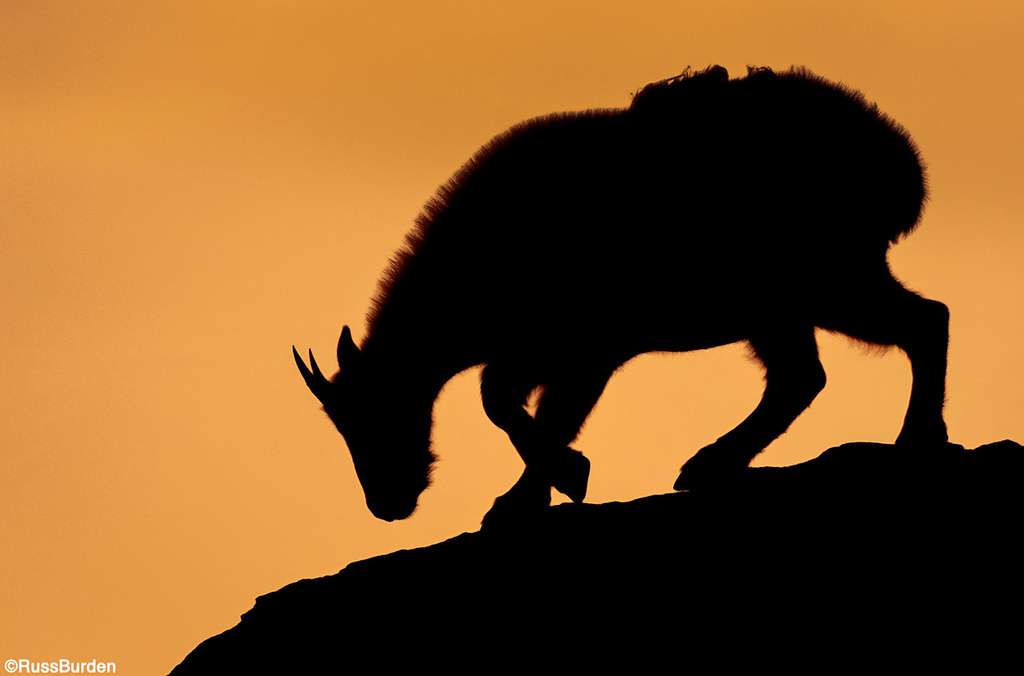
As I stated above, many dominant subjects will be silhouettes. Metering depends on how much silhouetted area is included. It’s also important to monitor the red channel because the delicate warm tones are the easiest to lose highlight detail—note the photos of the acacia tree in silhouette and the rising sun behind the mountain reflected in the lake. Both exposures were based solely on the red channel on my histogram. If an animal is your primary subject, be cognizant of the shutter speed. If they display even the slightest movement, you may wind up with ghosting. It’s best to create tack-sharp renderings of them.
With regards to technique, much of this is known, but I never take anything for granted. Be sure to use a solid tripod for long exposures to obtain the necessary and required depth of field. Stop down the lens to a small opening to increase the range of focus. Use a good wide-angle zoom to fine-tune the composition. My arsenal consists of a 10-17mm and 16-80mm. To help ensure no camera movement, use the self-timer or cable release. A grad ND and polarizer are great to enhance or control the drama. Maintain a low ISO to eliminate noise. To maximize your depth of field, place the focus point one-third into the frame and use a small lens opening.
Take advantage of the five to 15-minute window that can be magnificent. Learn to read subtle light, and as they say, “Let there be light.”
To learn more about this subject, join me on a photo safari to Tanzania. Visit www.russburdenphotography.com to get more information.